Blog

  • Your LinkedIn Headshot: What Makes a Profile Photo Work

    Your LinkedIn Headshot: What Makes a Profile Photo Work

    Your LinkedIn photo is often the first impression you make on a recruiter, a client or a new colleague, sometimes before you’ve met. It’s also shown very small: next to comments, in search results, in messages. A photo that works at that size needs a few specific things.

    Make your face fill the frame

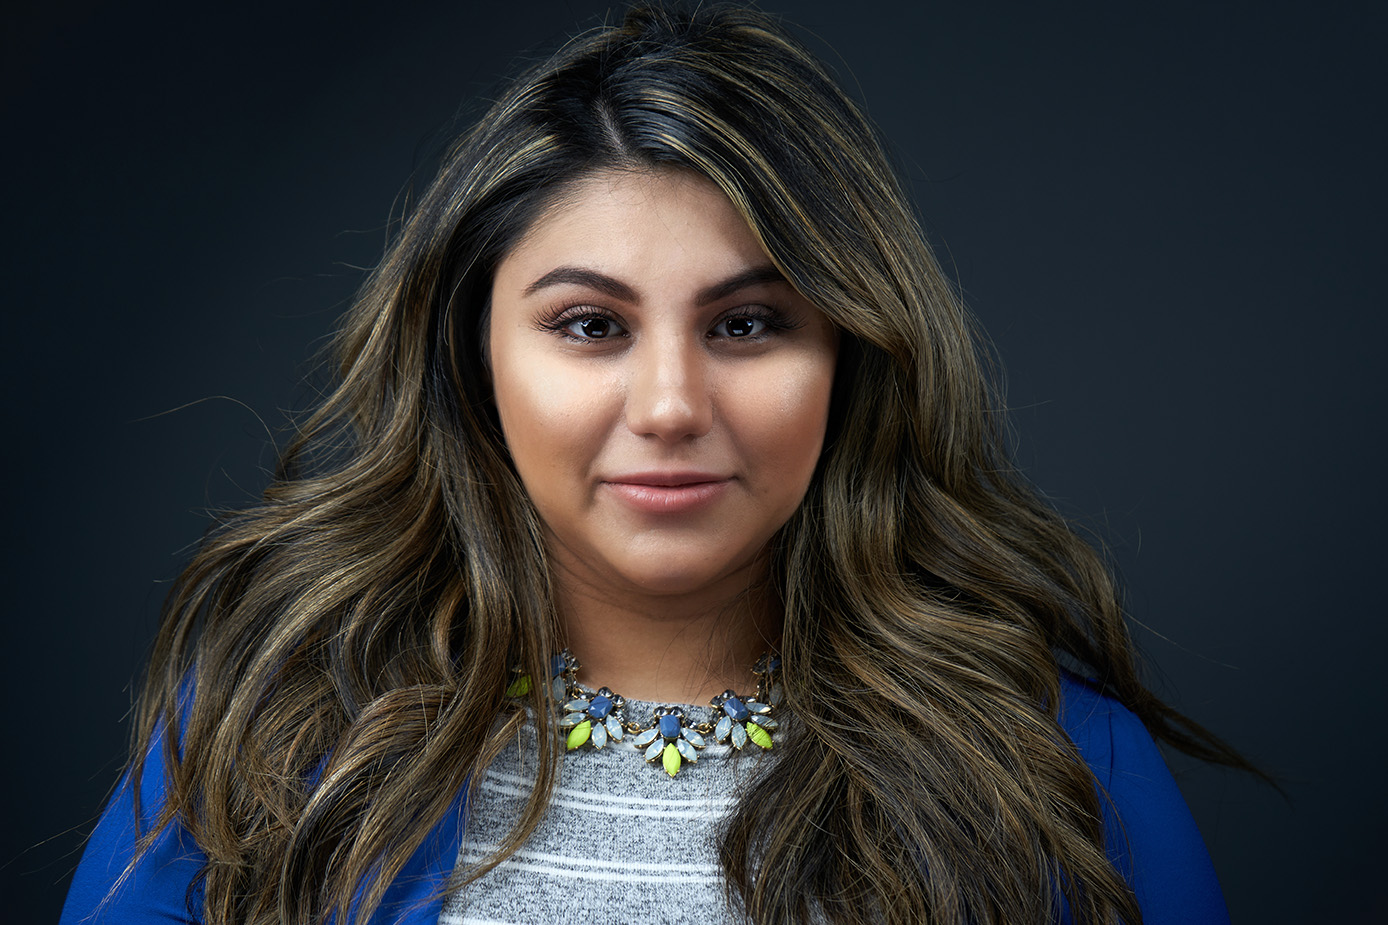
    LinkedIn crops your photo into a circle. If the image is a wide shot, your face becomes a tiny dot. A headshot cropped from the shoulders up, with your face taking up most of the frame, stays recognizable even as a thumbnail. Upload a square, high-resolution version so LinkedIn doesn’t have to stretch it.

    Expression: confident and approachable

    On LinkedIn, people want to know two things: do you seem competent, and do you seem easy to work with? A relaxed face, eyes slightly narrowed rather than wide open, and a genuine smile that reaches the eyes send both messages. Read how to look confident and approachable in your headshot.

    A simple background with contrast

    A plain, softly lit background keeps the focus on you. Make sure there’s contrast between you and the background so you don’t blend in at small sizes. Avoid busy offices, cars and cropped vacation photos.

    Look like you do today

    If someone wouldn’t recognize you from your photo when they meet you, it’s time to update it. A new role, a new hairstyle or simply a few years are all good reasons. The goal is a photo that builds trust, and that starts with it being accurate.

    Dress for your next meeting

    Wear what you would wear to meet a new client in your field. See what to wear for your headshot.

    Common mistakes

    • Selfies taken at arm’s length, which distort the face.
    • Group photos with other people cropped out.
    • Sunglasses, hats or heavy shadows on the face.
    • Low-resolution images that look blurry.
    • A photo that’s many years out of date.

    Use the same photo everywhere

    Your LinkedIn photo, company bio, email signature and speaker profiles work best when they match. People start to recognize you across platforms, which is the point of a professional image. Every session delivers files prepared for LinkedIn, websites and print.

    Beyond the photo

    Your headshot gets people to stop; your profile keeps them reading. Pair it with a clear headline that says what you do, a background banner that fits your field, and an “About” section written in your own voice.

    Frequently asked questions

    Can I use the same headshot for LinkedIn and my company website?

    Yes, and you should. Consistency helps people recognize you. If your company uses a specific background for its team page, use that version on LinkedIn too.

    How often should I update my LinkedIn photo?

    Whenever it no longer looks like you. Returning clients can book a refresh session whenever they need one.


    Ready for a headshot that looks like you on your best day?

    Every session includes expression coaching and professional retouching, in my studio in Indianapolis or at your office. See sessions and rates, or tell us what you need and we’ll help you plan it.

  • Choosing the Right Colors for Your Headshot

    Choosing the Right Colors for Your Headshot

    Color is the first thing people notice in a headshot after your face. The right colors make your skin look healthy and keep attention on your eyes; the wrong ones pull focus or wash you out. Here’s how I think about color with clients.

    Start with your skin tone

    Colors that suit you in everyday life will usually suit you on camera. If people often compliment you in a particular shade, bring it. In general:

    • Warmer skin tones often look great in earthy and warm colors: olive, camel, rust, warm navy, cream.
    • Cooler skin tones often look great in jewel tones and cool neutrals: navy, emerald, burgundy, charcoal, soft blue.
    • Mid-tones like navy, charcoal and deep green suit almost everyone.

    Mid-tones are the safe choice

    Very bright colors can reflect onto your skin and draw the eye away from your face. Very light colors can blend into a light background. Mid to deep tones give contrast and keep the focus where it belongs.

    White and black

    Pure white can look harsh and lose detail; it works best as a shirt under a jacket. Black can also lose texture, especially against a dark background. Both are fine with the right backdrop, and we can adjust the background to suit your outfit.

    What colors communicate

    Colors carry associations, and you can use them deliberately:

    • Navy and charcoal: steady, professional, safe for almost any industry.
    • Blues: calm and approachable.
    • Greens: natural and balanced.
    • Burgundy and deep reds: confident and warm, in moderation.
    • Soft neutrals: relaxed and modern, good for creative and wellness fields.

    These are associations, not rules. A color that suits you will always beat a color chosen only for what it “means”.

    Think about the background

    Your outfit and the backdrop work together. A dark suit stands out against light or mid-gray; a light blouse stands out against a darker background. For teams, choosing one background and sharing a short color guide keeps everyone’s portrait consistent. Read choosing the right background.

    And your brand colors?

    You can echo your brand color in a tie, a scarf or a top, but there’s no need to wear your logo color head to toe. A subtle touch is enough.

    Frequently asked questions

    Can I bring several colors?

    Yes. The Pro Session includes up to two outfits and the Premium Session up to six. We’ll compare them on screen during the session.

    Will my colors be accurate in the final images?

    Yes. Professional lighting and retouching keep colors and skin tones true. Please don’t apply filters afterward; converting to black and white is fine.

    For more wardrobe advice, read what to wear for your headshot, or see my work on the headshot photographer in Indianapolis page.


    Ready for a headshot that looks like you on your best day?

    Every session includes expression coaching and professional retouching, in my studio in Indianapolis or at your office. See sessions and rates, or tell us what you need and we’ll help you plan it.

  • Mastering Facial Expressions for Stunning Headshots

    Mastering Facial Expressions for Stunning Headshots

    Many people who sit down in my studio tell me the same thing before we start: “I’m not photogenic.” After years of photographing executives, attorneys, physicians and entire corporate teams in Indianapolis, I can tell you that being photogenic isn’t a gift some people have and others don’t. It’s mostly expression, and expression can be coached.

    This guide explains what I look for in a face, the small adjustments that change how a headshot reads, and what expression coaching actually looks like during a session.

    Why expression matters more than anything else in a headshot

    Lighting, wardrobe and background all matter, and I spend real time on each of them. But when someone looks at your headshot, the first thing they read is your face, and they decide very quickly whether you seem competent and whether you seem easy to work with.

    Those are the two messages a professional headshot has to send: confidence and approachability. Too much of the first and you look cold. Too much of the second and you can look unsure. Most of my coaching is about finding the balance that fits you and your field.

    Your headshot also has to work very small. On LinkedIn, in an email signature or on a team page, it is often shown at the size of a thumbnail. Subtle expressions disappear at that size, while clear, intentional ones still read.

    The small adjustments that change everything

    The eyes: a slight “squinch”

    Wide-open eyes, the way most of us look at a camera, read as surprised or nervous. Raising the lower eyelids just a little, without closing the eyes, makes the same face look focused and self-assured. Photographers call it the squinch. It’s one of the quickest changes I make in a session.

    The smile: genuine, and often smaller than you think

    A posed smile involves only the mouth. A genuine one reaches the eyes, and viewers can feel the difference even if they can’t name it. That’s why “say cheese” never works.

    For many professional headshots, the strongest option is a micro-smile: a relaxed, slightly closed-mouth smile that warms the face without looking like a holiday photo. I always photograph a range, from serious to a full smile, because the right expression depends on where the image will be used. An attorney’s firm bio and a real estate agent’s listing photo rarely call for the same one.

    The jaw and neck: forward and slightly down

    When people get nervous, they pull their head back, and that softens the jawline. Bringing the face slightly forward toward the camera and tipping the chin down a touch defines the jaw and gives the portrait presence. It feels strange in the moment and looks natural in the photo, which is exactly why you need someone watching from the other side of the lens.

    The body: posture shows in the face

    Even in a tight headshot, the body changes the expression. Raised shoulders read as tension. Squaring up to the camera can look confrontational, while a slight angle feels more open. Breathing out just before the shot relaxes the mouth. I adjust these details as we go so you don’t have to think about them.

    For more on angles and posture, read how to choose the right angle for your headshot.

    Why it’s so hard to do on your own

    You can practice all of this in a mirror, and it helps. But a mirror shows you a reversed face, and you can’t watch yourself and hold an expression at the same time. Most people also overdo it: the squinch becomes a squint, the micro-smile becomes a smirk.

    That’s the real value of being directed. Instead of guessing, you get precise instructions and immediate feedback, and we work through guided variations until the face on the screen looks like the best version of you.

    What expression coaching looks like in a session

    1. We talk first. Where will the headshot be used, and what impression do you want to make? A first-time founder and a hospital department head need different things.
    2. We get you comfortable. Your playlist, real conversation, no rush. Nobody looks relaxed when they feel watched.
    3. We work through guided variations. Eyes, smile, jaw and posture, one adjustment at a time, so nothing is left to chance.
    4. We review together on screen. You see the images as we shoot, so you can tell me what feels like you and we can refine from there.
    5. You choose, then we retouch. Retouching polishes skin, flyaways and small distractions. It can’t create an expression that wasn’t there, which is why we put so much care into capturing it.

    Expression is one of the seven elements I control in every session, along with light, composition, wardrobe, accessories, hair and posing. You can see how they come together on my headshot photographer in Indianapolis page.

    Matching your expression to your industry

    • Legal and finance: calm, steady and composed, usually with a micro-smile rather than a full one.
    • Real estate and client-facing roles: warmer and more open. Clients need to feel they can pick up the phone.
    • Healthcare and academia: kind and trustworthy, with relaxed eyes.
    • Tech and creative: natural and personable. A slightly less formal expression often fits best.

    For a team, consistency matters as much as the individual expression, so everyone’s portrait feels like it belongs on the same page.

    Frequently asked questions

    Should I practice my expressions before the session?

    A little practice in the mirror is fine, but don’t arrive with a rehearsed smile. It’s easier to coach a relaxed face than to undo a practiced one. Get a good night’s sleep and leave enough time to arrive without rushing.

    I don’t like my smile. Can I still have a good headshot?

    Yes. We’ll photograph a range of expressions, including closed-mouth options like the micro-smile, and you’ll see them on screen as we go, so you can choose the one you’re comfortable with.

    I’m camera-shy. Is expression coaching for me?

    Yes. Clear direction removes the guesswork that makes people tense, so you don’t have to know what to do with your face. I’ll tell you. Read more in how to look more confident in photos.


    Ready for a headshot that looks like you on your best day?

    Every session includes expression coaching, in the studio in Indianapolis or at your office. See the sessions and rates, or tell us what you need and we’ll help you plan it.

  • Headshot Angles and Posing: How to Find Your Best Side

    Headshot Angles and Posing: How to Find Your Best Side

    Ask most people which side is their “good side” and they’ll guess. In a headshot, the angle of your face, the position of your head and the line of your shoulders do as much work as the lighting. The good news: you don’t need to know any of it before you arrive. Guiding it is my job. Here’s what I’m looking at when I adjust you in front of the camera.

    1. Camera height

    The camera sits roughly at eye level or slightly above. Much lower and the viewer looks up your nose and under your jaw. Much higher and you can look small, as if the viewer is looking down on you. For most professional headshots, a lens just above the eyes is the most flattering and the most neutral.

    2. Turning the face and shoulders

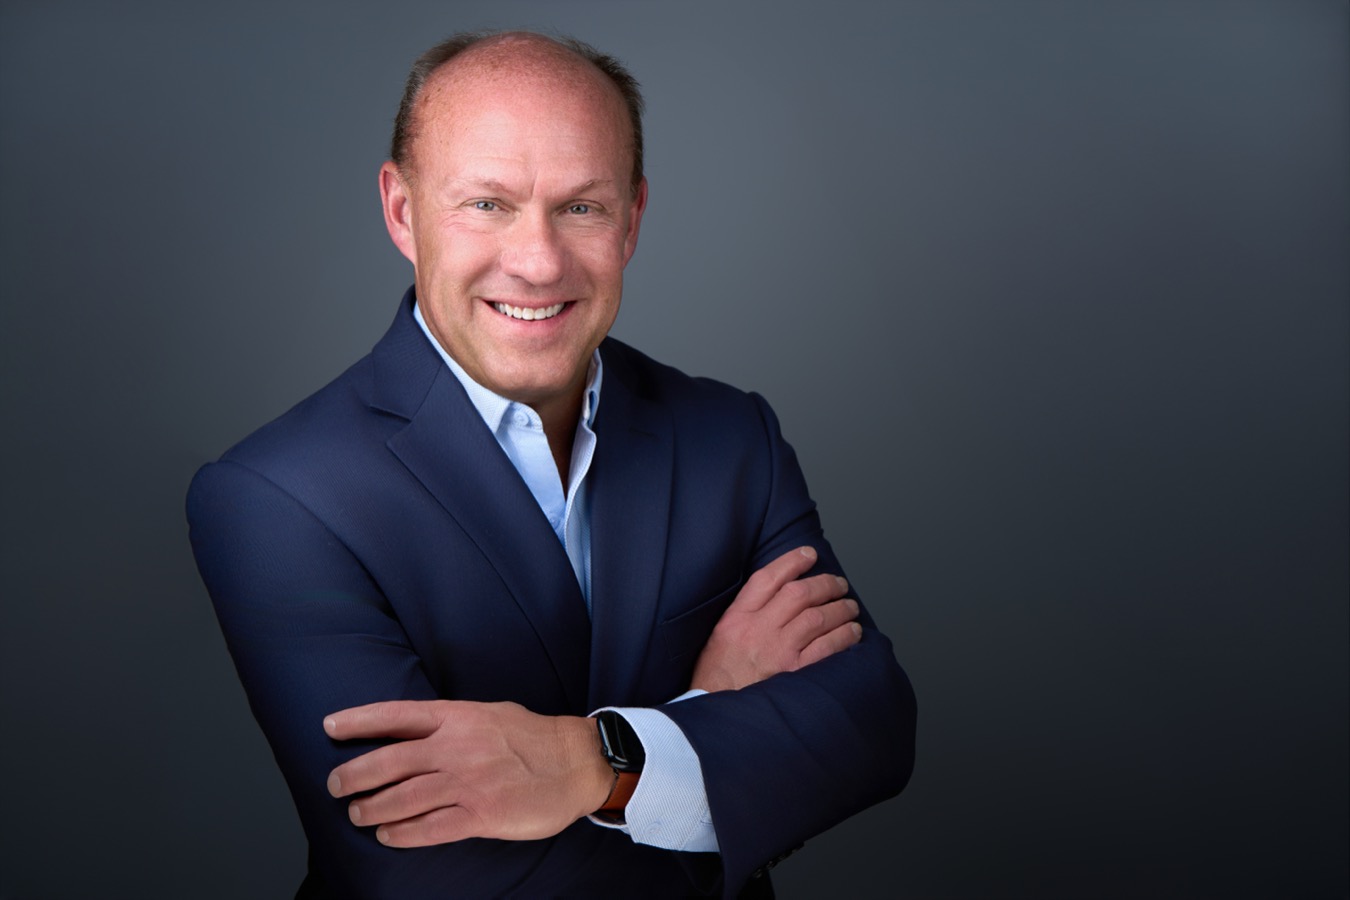
    Facing the camera squarely, shoulders and all, tends to look stiff and wide. Turning the shoulders slightly away while bringing the face back toward the lens creates depth and a more natural, open feeling. How far we turn depends on your face and on the message: a straighter pose reads as direct and authoritative, a softer angle as approachable.

    3. Your “good side”

    Most faces are slightly asymmetrical: one eye a little more open, a part in the hair, a smile that lifts more on one side. I photograph both sides early in the session and we look at them together on screen. Often the difference is obvious once you see it; sometimes both work, and we keep both.

    4. Head position: forward and slightly down

    Nervous people pull their head back. That softens the jawline and can create a double chin even on a slim face. Bringing the face slightly forward toward the camera, with the chin just a touch down, defines the jaw and gives the portrait presence. It feels odd for a moment and looks natural in the image.

    5. Posture and shoulders

    Posture shows in the face, even in a tight crop. I’ll ask you to sit or stand tall, drop your shoulders away from your ears and breathe out before the shot. Small details, like which shoulder is closer to the camera or where your hands are, change whether you look relaxed or rigid.

    6. Framing and crop

    A headshot is usually cropped from mid-chest up, with your eyes in the upper third of the frame. Modern crops are often tighter than traditional portraits, so the viewer connects with your eyes even when the image is shown small on LinkedIn or a team page. I always leave enough room around you so the image can be cropped square, horizontal or vertical for different uses.

    Why you need someone on the other side of the lens

    You can’t see your own angles while you hold them, and a mirror shows a reversed face. That’s why every session is built on guided variations: small adjustments, one at a time, reviewed together on screen. Posing is one of the seven elements I control in every session, along with light, composition, expression, wardrobe, accessories and hair. You can see how they come together on my headshot photographer in Indianapolis page.

    For the face itself, read how to look confident and approachable in your headshot.

    Frequently asked questions

    Do I need to practice poses before my session?

    No. Arrive relaxed and I’ll guide every position. Practiced poses are often harder to correct than natural ones.

    What if I don’t like my profile?

    We’ll find an angle that works for you and show it to you on screen before moving on. You’ll never leave without seeing options you’re comfortable with.


    Ready for a headshot that looks like you on your best day?

    Every session includes expression coaching and professional retouching, in my studio in Indianapolis or at your office. See sessions and rates, or tell us what you need and we’ll help you plan it.

  • Professional Headshots vs DIY, Selfies and AI Headshots

    Professional Headshots vs DIY, Selfies and AI Headshots

    You have more options than ever for a profile photo: a phone selfie, a photo taken by a colleague, an AI app that generates headshots from your selfies, or a professional session. Here’s an honest look at each.

    Phone and DIY photos

    A modern phone can take a good picture, and for casual social media that may be enough. For a professional headshot, a few things usually go wrong:

    • Distortion. Arm’s-length selfies use a wide lens close to the face, which enlarges the nose and shrinks the ears.
    • Uncontrolled light. Window light and overhead office lights create harsh shadows or flat, gray skin.
    • No direction. Nobody is watching your angle, posture or expression, and you can’t see them yourself.
    • No consistency. Photos taken by different people in different places never match on a team page.

    If you do take your own photo: face a window, put the camera at eye level a few feet away, use a plain wall, and take many shots.

    AI-generated headshots

    AI apps can turn a set of selfies into polished-looking portraits in minutes. They’re quick and inexpensive, but they come with real drawbacks:

    • They may not look like you. Small changes to your features add up, and people notice when you look different in person.
    • Odd details. Ears, teeth, glasses, hands and clothing are often subtly wrong.
    • Authenticity. A headshot is meant to show who people will meet. An image of an idealized version of you can undermine the trust it’s supposed to build.

    A professional session

    What you get with a professional headshot is control and direction:

    • Lighting designed for your face, in the studio or in a temporary studio at your office.
    • Expression coaching, so you look confident and approachable rather than posed.
    • Posing and grooming details handled for you: angles, collars, ties, glasses, flyaways.
    • Professional retouching that polishes while keeping you recognizable.
    • Consistency for teams, with matching lighting and backgrounds.
    • Usage rights for all media, worldwide, for 10 years.

    Which one do you need?

    If the photo is just for a personal social account, DIY may be fine. If it represents you or your company to clients, recruiters or the press, a professional headshot is an investment that lasts for years.

    Frequently asked questions

    How much does a professional headshot cost?

    With me, a Pro Session is $250 and team headshots start at $160 per person. See the rates page.

    I’m not photogenic. Will a professional session really make a difference?

    Yes. Most of what people call “photogenic” is angle and expression, and both can be coached. Read how to look confident and approachable in your headshot.

    See real results on my headshot photographer in Indianapolis page.


    Ready for a headshot that looks like you on your best day?

    Every session includes expression coaching and professional retouching, in my studio in Indianapolis or at your office. See sessions and rates, or tell us what you need and we’ll help you plan it.
  • Choosing the Right Background for Your Corporate Headshot

    Choosing the Right Background for Your Corporate Headshot

    The background is the quietest part of a headshot, and that’s exactly its job: to make you stand out without competing with you. Here’s how to choose one, whether it’s for your own portrait or for a whole team.

    The main options

    • Light gray or off-white: clean, modern and easy to place on a website. Works for almost any industry.
    • Mid to dark gray: classic and professional, with a little more depth and contrast. A strong choice for executives and legal or financial roles.
    • Dark, almost black: dramatic and premium. Great for personal branding and speaker bios, less common for large team pages.
    • Pure white: useful when a company wants images that blend into a white website, or for easy cutouts.
    • Colored backdrops: can echo a brand color, but use them carefully. A strong color can clash with skin tones or outfits.

    Start from where the image will live

    Look at the page where your headshot will appear. If your company’s website is white and airy, a light background will feel at home. If your brand is dark and premium, a deeper background fits better. For LinkedIn, contrast matters most: your face should stand out clearly even as a small circle.

    Contrast with your outfit and hair

    The background should separate you from it. Dark hair and a dark suit against a black backdrop can disappear; the same outfit against a mid-gray stands out. Choosing the backdrop with your outfit and hair in mind is part of composition, one of the seven elements I control in every session.

    Avoid busy backgrounds

    Offices, bookshelves and windows behind you add clutter and date quickly. A plain, softly lit backdrop keeps attention on your face and stays usable for years. If you want an environmental look, keep it simple and out of focus.

    For teams, consistency is everything

    On a team page, mismatched backgrounds make a company look disorganized. When I photograph a team, everyone gets the same backdrop and lighting, and we keep the setup on file so new hires can be photographed later and still match. Read more about consistent team portraits.

    Frequently asked questions

    Can I choose a different background later?

    The backdrop is chosen at the session. Changing it afterward means cutting you out of the image, which rarely looks as natural, so it’s worth deciding before we start.

    Do you photograph outdoors?

    No. All sessions take place in my studio in Indianapolis or in a temporary studio set up indoors at your office, so the background and light are always controlled.

    See the backgrounds in my portfolio on the headshot photographer in Indianapolis page.


    Ready for a headshot that looks like you on your best day?

    Every session includes expression coaching and professional retouching, in my studio in Indianapolis or at your office. See sessions and rates, or tell us what you need and we’ll help you plan it.
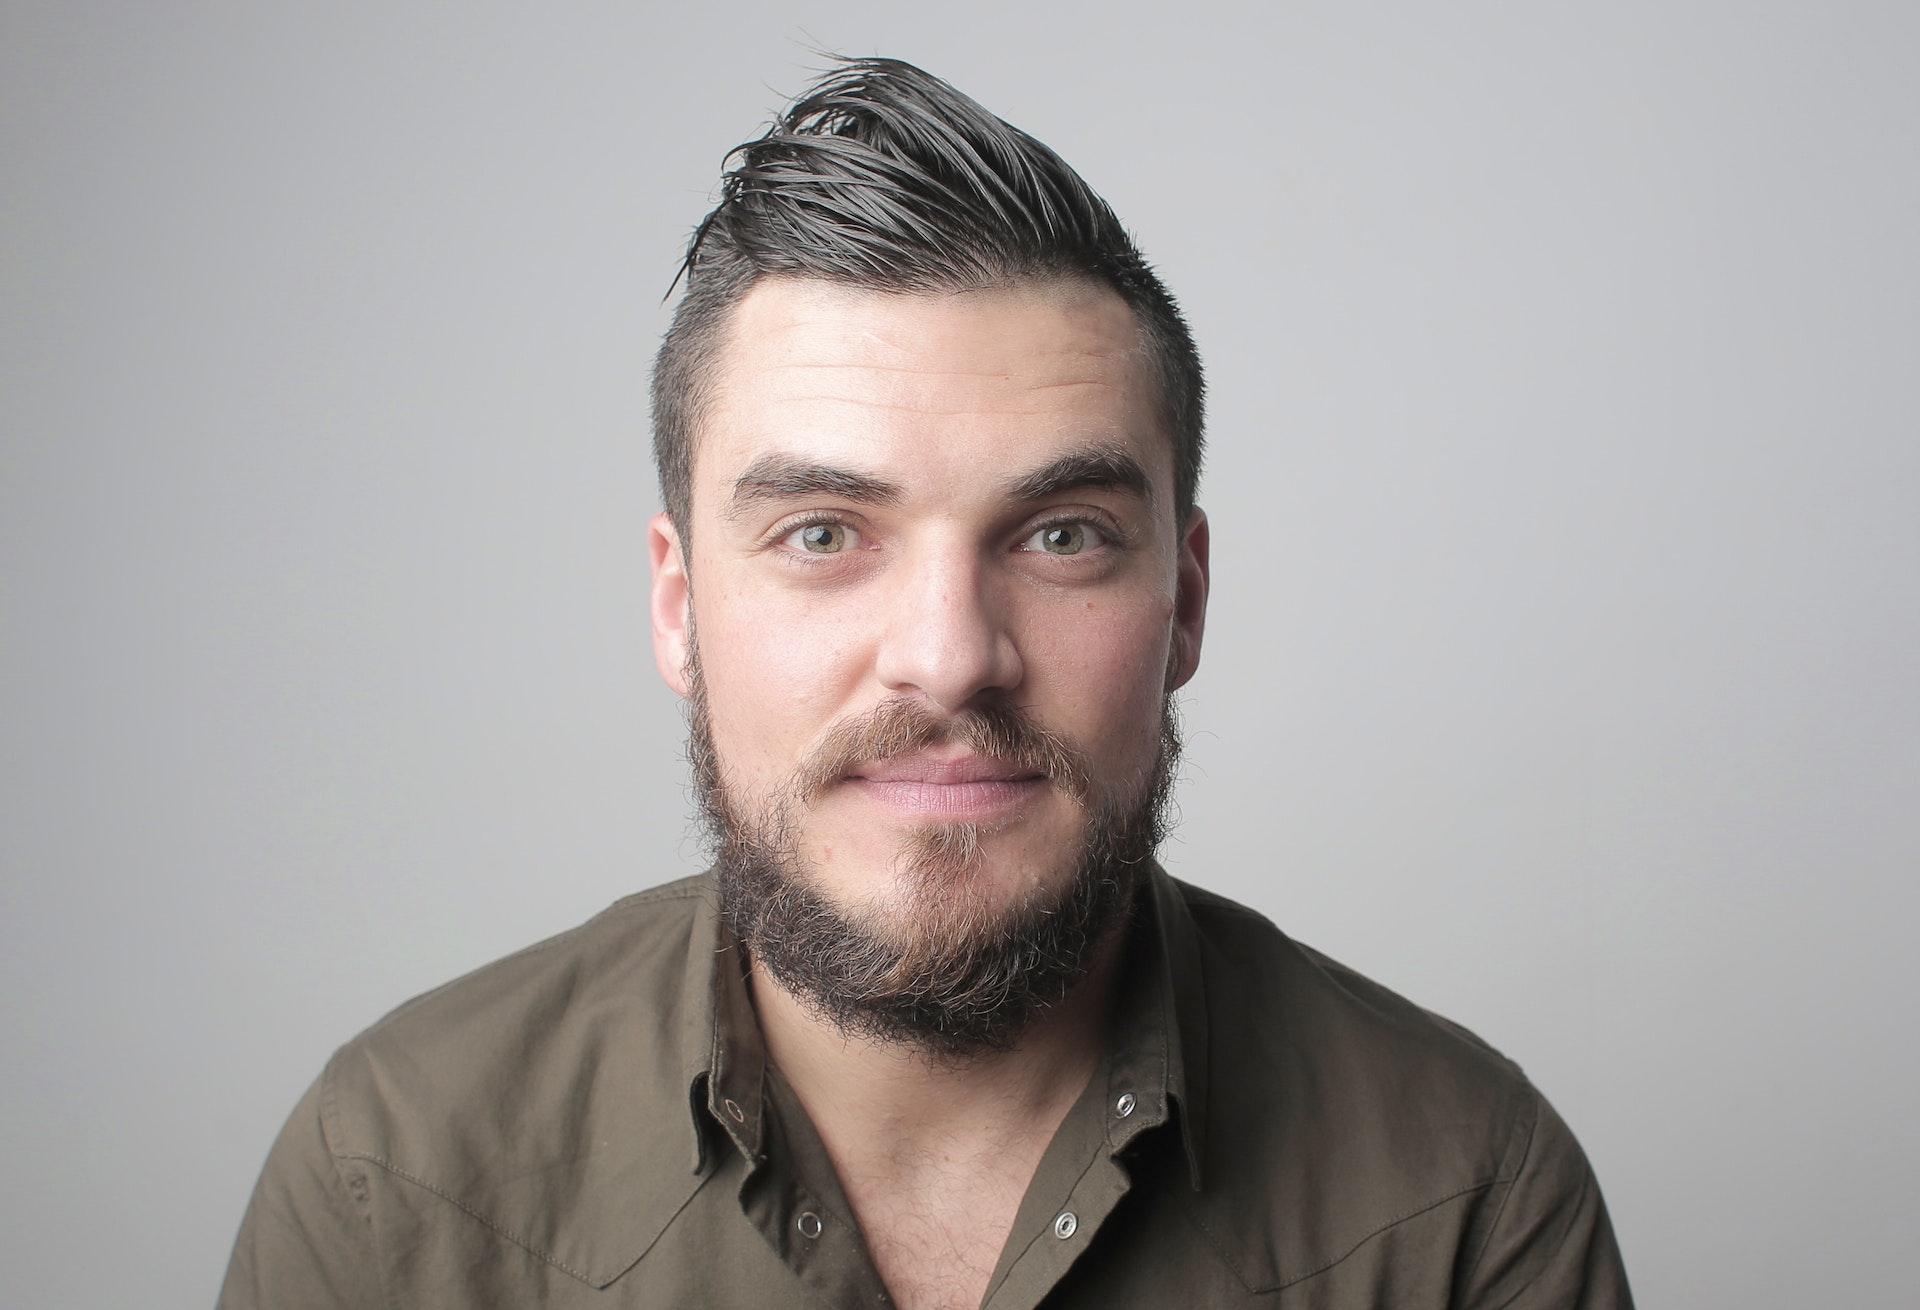
  • Your Headshot and Your Personal Brand

    Your Headshot and Your Personal Brand

    Your personal brand is what people expect from you before they’ve worked with you. Your headshot is the visual part of it, and often the part people see first: next to your name on LinkedIn, on a conference program, beside an article you wrote, on your own website.

    What your headshot should say

    Before your session, think about how you want people to feel when they see your photo. Most professionals want some mix of two messages: confidence (I know what I’m doing) and approachability (I’m easy to work with). The balance depends on your role. A trial attorney, a startup founder and a wellness coach will each lean differently, and I coach your expression to match.

    Consistency builds recognition

    A personal brand works through repetition. Using the same headshot, or images from the same session, across LinkedIn, your website, your email signature and your speaker profiles helps people recognize you. Mixing a ten-year-old photo on one platform with a selfie on another sends the opposite message.

    When one image isn’t enough

    If you speak, publish, consult or run your own business, you’ll likely need more than one image:

    • A classic headshot for bios and directories.
    • A warmer, more relaxed version for social media.
    • A different outfit or background for your website or a book jacket.
    • A horizontal image for banners and press.

    That’s what the Premium Session is for: a full hour, up to six outfit changes and six retouched images, so you leave with a complete set of portraits. See the rates page.

    Speakers and authors

    Event organizers and publishers usually ask for a high-resolution headshot on short notice. Having a professional set ready, in color and in black and white, saves you from sending whatever photo you can find. Under my terms, you may convert your photos to black and white yourself.

    Keep it current

    A personal brand evolves with your career. When your role, your look or your audience changes, update your images. Returning clients can book a refresh session whenever their headshot no longer looks like them.

    Frequently asked questions

    Should my headshot be formal or casual?

    Match what your clients expect when they meet you. A consultant who always wears a suit should wear one; a creative director might not.

    Can I use my photos commercially?

    Yes. Delivered photos include the right to use and distribute them on all media, worldwide, for 10 years, renewable on request. See the terms and conditions.

    My approach to personal branding portraits is described on my headshot photographer in Indianapolis page.


    Ready for a headshot that looks like you on your best day?

    Every session includes expression coaching and professional retouching, in my studio in Indianapolis or at your office. See sessions and rates, or tell us what you need and we’ll help you plan it.
  • Lighting in Headshot Photography: Why It Makes the Portrait

    Lighting in Headshot Photography: Why It Makes the Portrait

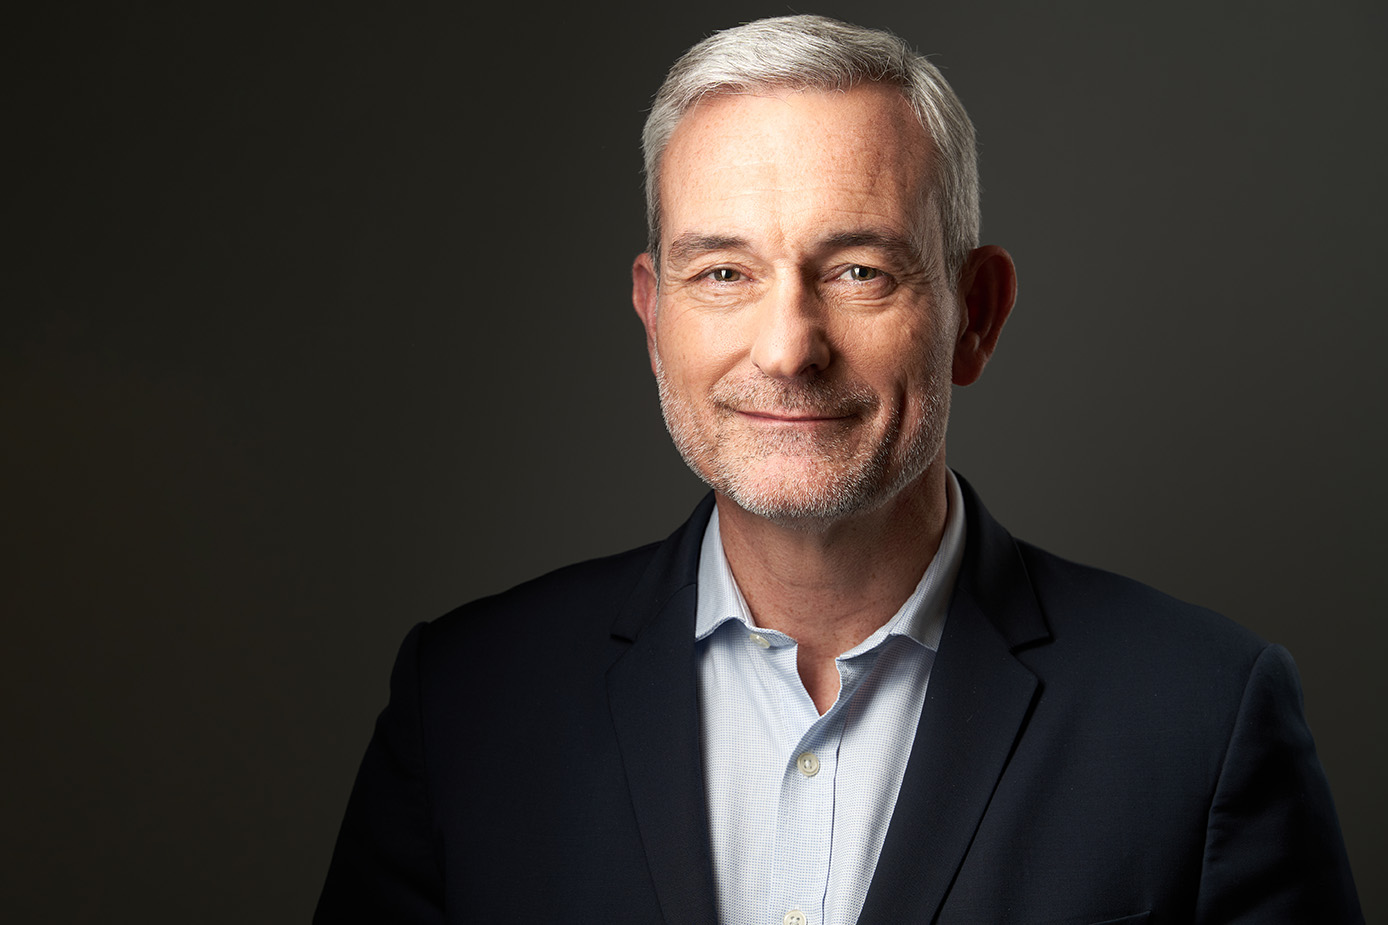
    Lighting is the first of the seven elements I control in every session, and for good reason: the same person, in the same outfit, can look tired or energized, flat or sculpted, depending only on the light.

    What good headshot lighting does

    • Shapes the face. Light from slightly to the side creates gentle shadows that define the cheekbones and jawline.
    • Brings out the eyes. A small reflection of the light in the eyes, called a catchlight, makes the face look alive.
    • Flatters the skin. Soft, diffused light smooths texture; hard, direct light exaggerates it.
    • Separates you from the background, so you stand out even when the image is shown small.

    Soft vs dramatic

    Soft, even light reads as warm and approachable. It suits client-facing roles, healthcare and most team photos. More contrast, with deeper shadows on one side of the face, reads as serious and confident and can suit executives or personal-branding portraits. I adjust the light to the message you want to send, and to your face.

    Why studio light instead of window light

    Natural light is beautiful but unpredictable. It changes with the time of day, the weather and the season, and it’s different in every office. Studio light is consistent, which matters for two reasons: every image in your session looks right, and a whole team can be photographed with identical lighting, even across different days. That’s why I don’t photograph outdoors: sessions take place in my studio in Indianapolis or in a temporary studio set up at your office.

    Lighting and glasses

    Glasses can reflect light straight back into the camera. Positioning the lights and the angle of the frames carefully removes most glare during the session, which is much better than trying to fix it in retouching.

    Color or black and white?

    Lighting also shapes how an image works in black and white. A well-lit portrait has enough contrast to look strong in both. Under my terms, you may convert your delivered photos to black and white yourself, which is useful for press and print, but color filters aren’t permitted.

    Lighting on location

    When I photograph at your office, I bring professional lights and a backdrop and build a controlled setup in your space, so the results look like studio portraits. All we need is a quiet room with enough space. Read studio vs on-site sessions.

    See how the light shapes each portrait on my headshot photographer in Indianapolis page.


    Ready for a headshot that looks like you on your best day?

    Every session includes expression coaching and professional retouching, in my studio in Indianapolis or at your office. See sessions and rates, or tell us what you need and we’ll help you plan it.
  • Corporate Headshot Dos and Don’ts

    Corporate Headshot Dos and Don’ts

    Most disappointing headshots fail for the same handful of reasons. Here are the dos and don’ts I share with clients, so your session goes smoothly and your portrait works everywhere you use it.

    Before the session

    • Do decide where the headshot will be used: LinkedIn, a company website, a bio, press.
    • Do choose solid colors and well-fitted clothes. See what to wear.
    • Do get a haircut about a week before.
    • Don’t wear small, busy patterns; they can shimmer on screens.
    • Don’t try new skincare or tanning products the day before.
    • Don’t arrive rushed. Tension shows in the shoulders and eyes.

    During the session

    • Do wear your glasses if you wear them every day. I’ll position them to avoid glare.
    • Do tell me what you like or don’t like as we review images on screen.
    • Do trust the direction, even when a position feels strange. Bringing your face slightly forward, for example, feels odd and looks great.
    • Don’t force a big “say cheese” smile. A relaxed or micro-smile usually works better.
    • Don’t worry about knowing how to pose. That’s my job.

    The image itself

    • Do keep the background simple and consistent with your company’s team page.
    • Do frame from the chest up, with your face filling enough of the frame to read as a thumbnail.
    • Don’t use a cropped group photo or a vacation picture.
    • Don’t over-retouch. Your headshot should look like you on a good day, not like someone else.

    After the session

    • Do use the same image across LinkedIn, your website and your email signature.
    • Do keep a high-resolution file for print and press.
    • Do update your headshot when it no longer looks like you.
    • Don’t apply color filters. You may crop your photos or convert them to black and white, but changing the colors isn’t permitted under my terms.
    • Don’t forget to download your images from the Customer Access page; they’re removed after two months.

    For teams

    • Do agree on a dress code and background before the day.
    • Do schedule short, staggered time slots so nobody waits.
    • Don’t mix photos from different photographers and years on the same team page.

    For more, read how to prepare for your headshot session, or see my approach on the headshot photographer in Indianapolis page.


    Ready for a headshot that looks like you on your best day?

    Every session includes expression coaching and professional retouching, in my studio in Indianapolis or at your office. See sessions and rates, or tell us what you need and we’ll help you plan it.
  • How to Prepare for Your Headshot Session

    How to Prepare for Your Headshot Session

    A great headshot starts before you walk into the studio. Preparation doesn’t need to be complicated, and most of the work happens during the session, where I coach your expression and posture. But a few simple steps make the difference between a good session and an easy one.

    A week before

    • Decide where the photo will be used. LinkedIn, your company website, a speaker bio or a press kit may each call for a slightly different look. Tell me when you book.
    • Choose your outfits. Solid colors and tailored layers work best. Bring options: the Pro Session includes up to two outfits and the Premium Session up to six. See what to wear for your headshot.
    • Plan haircuts ahead. Get a haircut about a week before rather than the day before, so it has time to settle.

    The day before

    • Sleep. Rested eyes are the most important thing you can bring.
    • Prepare your clothes. Iron or steam everything and hang it so it stays wrinkle-free.
    • Go easy on salt and alcohol if you can. Both tend to show in the face the next morning.

    On the day

    • Arrive with time to spare. Rushing shows in the shoulders and the eyes.
    • Bring what you need for touch-ups: comb or brush, lip balm, powder if you use it, glasses and their cleaning cloth.
    • Wear makeup the way you normally do, perhaps slightly more defined. See hair and makeup tips for your headshot.

    During the session

    You don’t need to know how to pose. We start with a short conversation about where the photo will be used, then I guide you through small adjustments to your angle, posture and expression. You see the images on screen as we go, so we can refine together. I also handle the details you’d only notice afterward: flyaways, a twisted collar, a tie that’s slightly off, glare on glasses.

    After the session

    You choose your favorite images, and we deliver them professionally retouched. Retouching polishes skin, flyaways and small distractions while keeping you looking like yourself.

    Common myths

    “I’m not photogenic.”

    Being photogenic is mostly expression and angles, and both can be coached. Many of my clients start their session saying exactly this.

    “I need to look like a model.”

    You need to look like yourself on a good day, confident and approachable. That’s what people who meet you later will recognize.

    “Retouching will fix everything.”

    Retouching polishes, but it can’t create an expression that wasn’t captured. That’s why the session itself matters most.

    Frequently asked questions

    How long does a session take?

    The Express Session for teams is 15 minutes per person, the Pro Session 30 minutes and the Premium Session 60 minutes. See the rates page for details.


    Ready for a headshot that looks like you on your best day?

    Every session includes expression coaching and professional retouching, in my studio in Indianapolis or at your office. See sessions and rates, or tell us what you need and we’ll help you plan it.